Dragon Quest Builders 2 is littered with fun, brain-teasing puzzles that are just waiting to be solved. However, simply finding these shrine puzzles can be even more challenging than solving the puzzles themselves.
If you want a detailed walkthrough on where to find all 10 of the shrine puzzles and how to solve them so you can get your hands on all of the game’s highly coveted mini medals, look no further. Here’s a grand guide to every shrine location and mini medal puzzle solution.
What You Need to Know About Shrines and Mini Medals
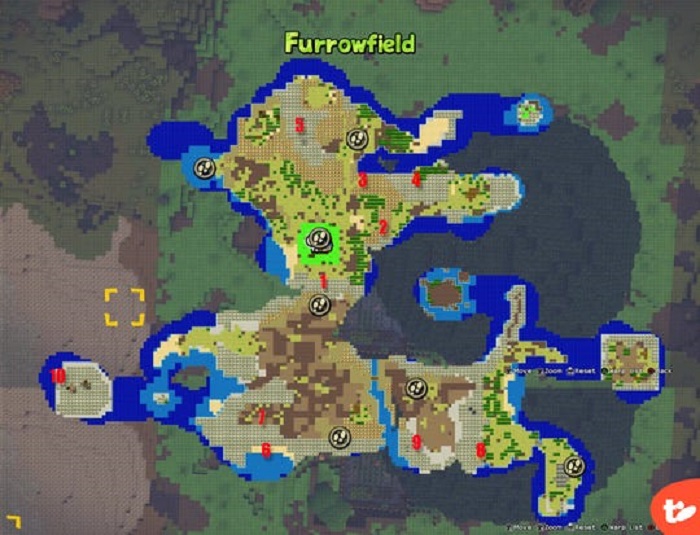
Mini medals are a unique currency in Dragon Quest Builders 2. You can unlock new crafting tools, other pieces of equipment and even cosmetic items for your character.
In order to unlock mini medals, you will have to complete a series of shrines puzzles. There are 10 shrines scattered throughout the map of Furrowfield. Each shrine location can be viewed within the illustration provided above. Note that each shrine is marked with a red number.
In order to use the mini medals, you will have to wait until you have progressed far enough within the story to make it back to the Isle of Awakening. From there, players can speak to the Hairy Hermit whenever they want to trade in some of their mini medals for awesome rewards.
Check out the information below for detailed walkthroughs on where to find and how to solve each and every puzzle.
Shrine/Puzzle Location #1
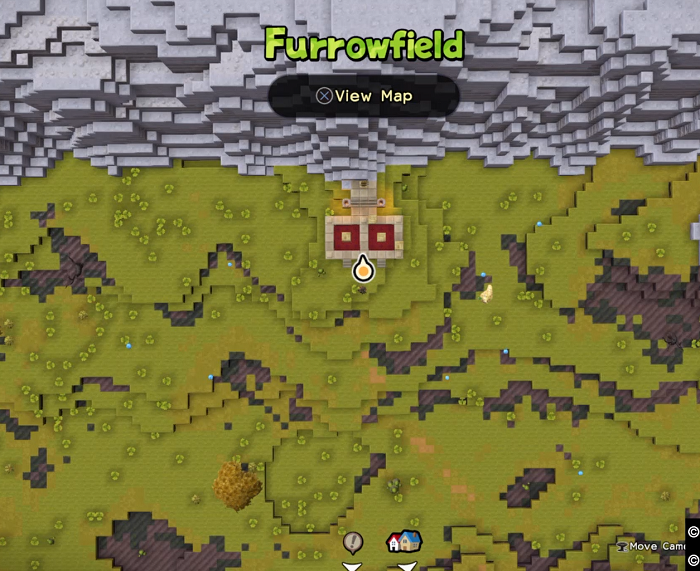
For the first shrine, make your way south of Furrowfield Farm. You may find the shrine from the location listed above.
First, interact with the shrine and check out the shrine’s description. You will find that this is perhaps the easiest of the shrines to solve. Simply move the pile of blocks to the top of the right-hand column so that it matches the column to the left. A notification will appear once the puzzle has been solved. After you complete the puzzle, interact with the shrine one final time to nab your mini medal.
If you are still stuck, check out the video below for a walkthrough of the puzzle.
Shrine/Puzzle Location #2
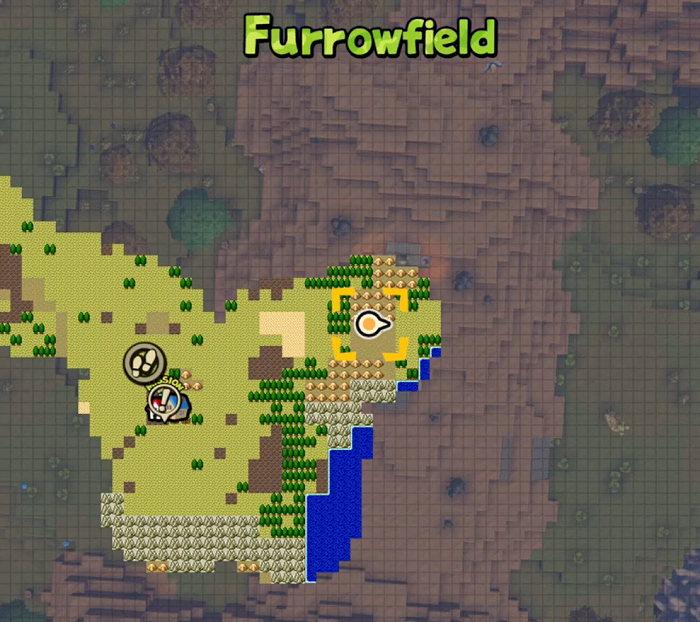
Make your way east of Furrowfield Farm in order to track down the second shrine. You will know you are in the right place when you start stumbling upon more and more brownstown. Once you arrive, you will find an empty pool just in front of the shrine.
Simply remove the single block that is blocking the water from flowing into the pool in order to solve the puzzle. Then, interact with the shrine to collect your medal.
A walkthrough of the puzzle may be viewed below.
Shrine/Puzzle Location #3
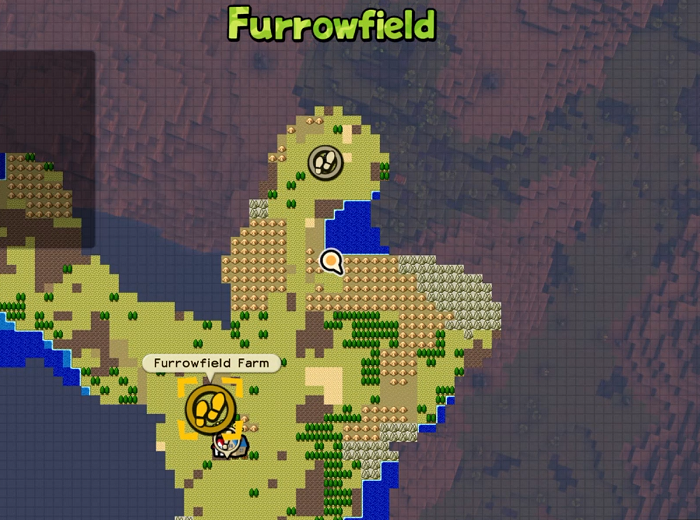
This time around, you are going to want to head northeast of Furrowfield Farm. After a little traveling, you will find a path lined with brownstone. There will be an adjacent body of water, which should help you know you’re in the right place.
To your right, you will find some stairs. Take the stairs down and you will soon discover the next shrine.
Just in front of the shrine, you will notice an empty space. Simply lay down a block to fill the gap and the puzzle will be complete. Interact with the shrine to collect your reward.
Check out the video below for a walkthrough of the puzzle.
Shrine/Puzzle Location #4
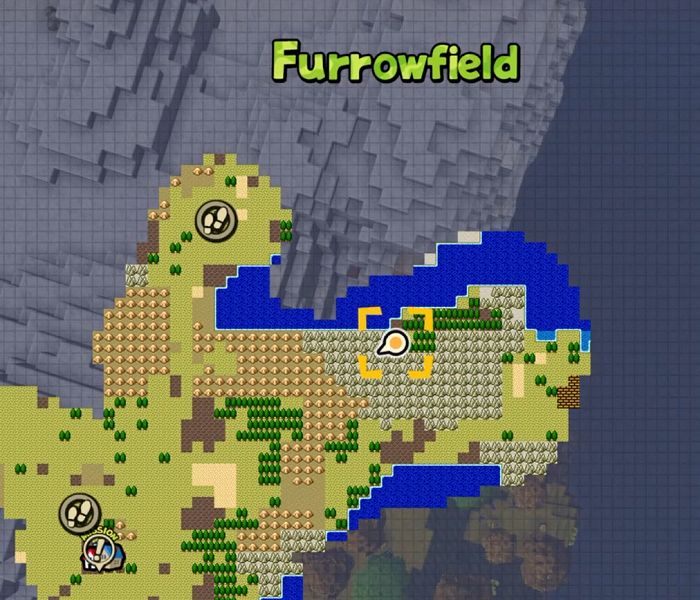
This shrine is also a little northeast of Furrowfield Farm. Make your way to the chalk pyramids You will know you are close when you see the Ogre nearby.
The puzzle is hidden away among some waterside trees, so it may not immediately be visible from a distance. Once you are at the shrine, climb up the nearby wall and remove the two blocks above the shrine that are blocking water from flowing downwards. This will complete the puzzle.
Don’t forget to grab your mini medal from the shrine afterwards. For a walkthrough of the puzzle, visit the video below.
Shrine/Puzzle Location #5
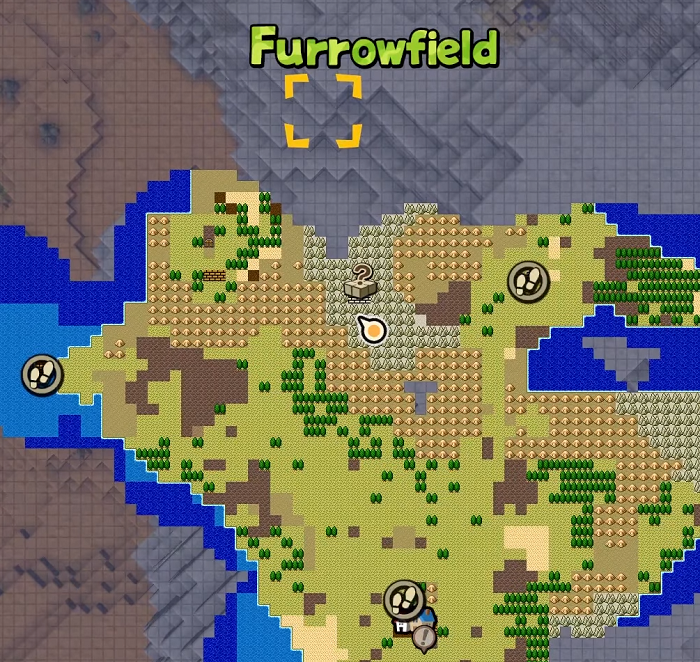
To find this puzzle, you will need to head northwest of the third shrine’s location. From there, you will find a cave within the while chalky mountains.
The goal of this puzzle is to move the water flow on your right into the pool to your left. However, you will have to remove some blockage and increase the water flow in order to make that happen.
Raise the height from which the water flows by first building a few blocks upwards, this will create enough flow to allow the water to reach the pool. It will take some experimenting to get the water to flow properly. Of course, you can circumvent this issue if you have a Bottomless Pot.
Check out a walkthrough of the puzzle down below.
Shrine/Puzzle Location #6
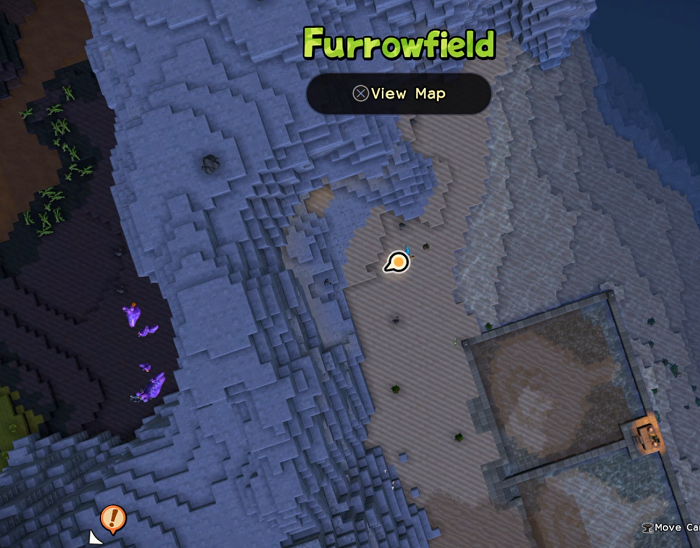
Head south of Furrowfield Farm and then take a left at the primary shrine until you discover a tunnel. The tunnel will take you to The Banks of the Bog warp zone.
From there, you are going to want to make your way through the massive hole along the chalky mountains. On the other side, you will find your next shrine.
In order to solve this puzzle, you are going to want to make the pool on the left match the pool on the right. If you zoom out on your map, you will notice that the pools form a slime monster silhouette.
Use your hammer to dig up two sand blocks from the silhouette’s mouth, which is within the left pool. Then, fill the two holes with the blocks mysteriously placed nearby.
View the video below for a walkthrough of the puzzle.
Shrine/Puzzle Location # 7
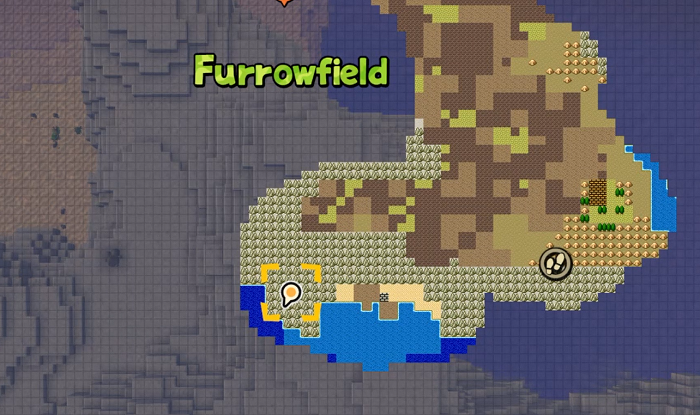
Make your way back to the other side of the chalky mountain and begin heading north. The next shrine is nearby.
You are going to need to connect a stream of water to a pool once again. First, remove the water blockage so the water can flow. Then, you will notice that the water flow is not strong enough to reach the pool.
From here, you will have to raise the height from which the water is flowing in order to strengthen the stream. However, you can also simply add water from your Bottomless Pot if you have the item.
A walkthrough of the puzzle may be viewed below.
Shrine/Puzzle Location #8
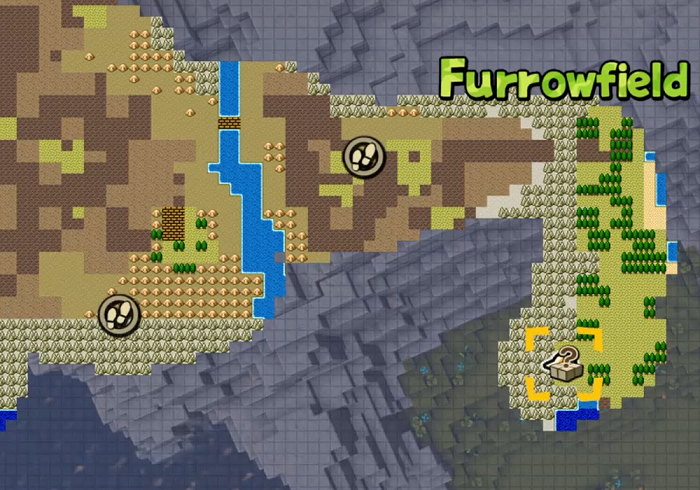
To find this shrine, you are going to want to make your way southeast of Furrowfield. You will know you’re near when you are west of the destroyed church orb portal.
The shrine is surrounded by beautiful blue plants among a small plot along the nearby mountain range. Simply collect the blue plants and place them within the empty grass patches to complete the puzzle.
Make sure to grab your medal from the shrine afterward. For a walkthrough of the puzzle, check out the video provided below.
Shrine/Puzzle Location #9
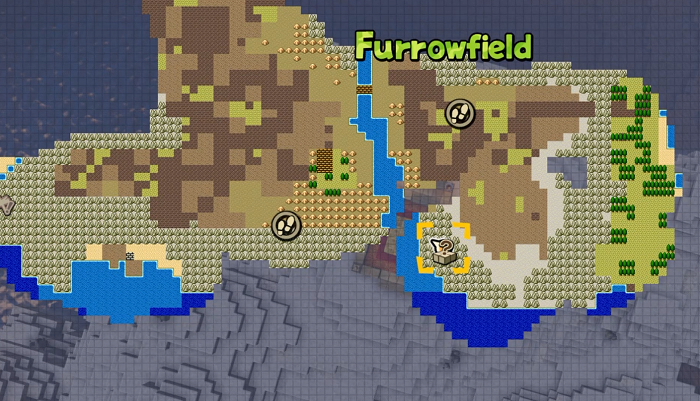
This puzzle is south of the tomato loving orc near the eighth shrine. Make your way to the top of the white, chalky mountain and you will discover the shrine. Take the sand blocks provided nearby and fill the gaps at the top of the block pile near the shrine to complete the puzzle.
A walkthrough of the puzzle may be viewed down below.
Shrine/Puzzle Location #10
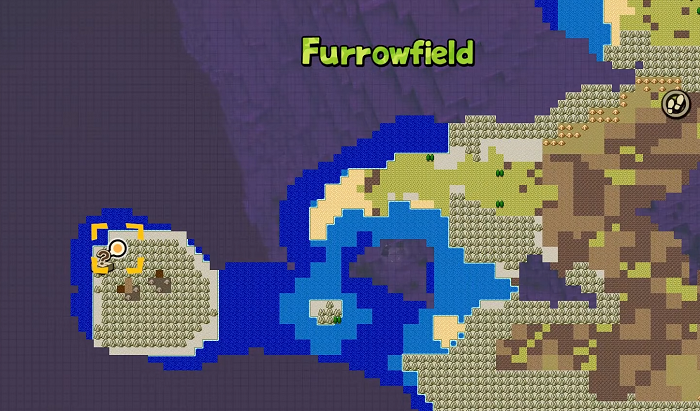
To get to the final puzzle, you will need to head southwest to the beach. You will know you are in the right place when you stumble upon a giant crab.
Make your way up the nearby mountain, leap off of the west side of the mountain and glide to the nearby small island with the tall chalk mountain. Once you make it to the island, it is time to repeat the process.
Make your way up the nearby mountain and then leap off of the west side. Glide to the next island nearby, which is the same island where you will collect Coraline flower seeds for the Deitree.
On the northwestern face of the island’s mountain, you will find the final shrine. Remove the block that is obstructing the shrine pool’s water flow and then add some water to the stream from your Bottomless Pot. This will complete the puzzle.
Check out the video below at the 11:45 mark for a walkthrough of the final shrine.




Comments are closed.