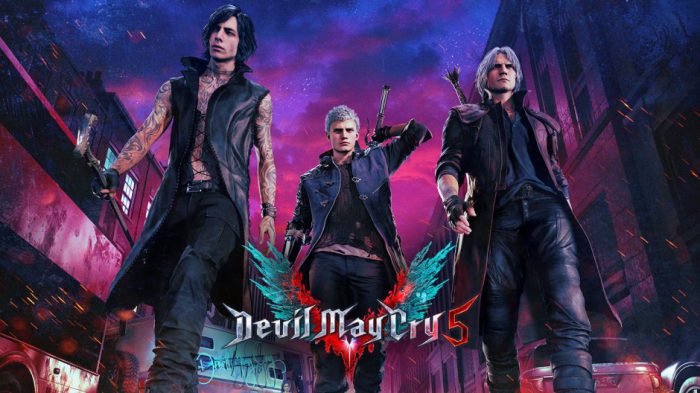
Devil May Cry 5 just hit stores Friday, March 8. With that in mind, the highly popular hack and slash series
Developed from the creative mind of Hideki Kamiya, the Devil May Cry (DMC) series dates all the way back to 2001. The game’s intense storyline features everything from battling demons to motorcycle swords. This is a series that puts an emphasis on fun, in all its great craziness.
Over the past years, the Devil May Cry series has garnered a passionate fan base of loyal players. And, well, Devil May Cry 5 is certainly not straying far from that trend.
Devil May Cry 5 has garnered positive critical reception, having already earned a Metacritic score of 87. While plenty of people are downloading the hack and slash adventure right now, not all players know how to get the most out of their Devil May Cry experience. But, don’t worry. We’ve got you covered.
What are DMC’s Secret Missions?
Devil May Cry campaigns are split between missions. Within Devil May Cry 5, there are 20 total missions that comprise the main campaign. That being said, there are even more missions to be played if you know what you’re doing.
There is a tradition within the DMC series, in which each game features a bevy of secret missions just waiting to be played. Devil May Cry 5 alone has 12 total secret missions that are each begging for some play time. Finding these missions can be a little tough, so we’ve decided to showcase each and every one to make sure you get the most out of your DMC experience.
DMC Secret Mission #1

Each and every one of the secret missions will require you to match up markers on various surfaces within the game. By perceiving the markings from exactly the right spot, all of the markings will unify to reveal a single glyph. Once the glyph has been aligned, you will be prompted to begin the secret mission at hand. Luckily, the first secret mission is also the easiest to conquer.
The first secret mission is located within
The mission isn’t difficult. You simply have to defeat all the enemies before the 90 second timer runs out. Good luck!
DMC Secret Mission #2

Your next glyph will be in
Trot down to the bottom of the staircase and travel to the nearby sewer grate. Once there, look up to reveal the inscriptions that you need to line up in order to activate the next glyph.
This secret mission is a little more tricky. You will be greeted by a flock of Red Empusa enemies. You will need to defeat them all before they escape, so work fast and furiously focus them one by one.
DMC Secret Mission #3

The next glyph is revealed within campaign mission four. Make it past the mission’s bridge and nab the nearby Nidhogg Hatchling. This will prompt a quick battle with some demons, so make sure to take those guys out.
Next, head into the nearby warehouse and trudge through to the ensuing streets. You should be able to see a massive mural on one of the nearby buildings. Summon Nightmare so that he can crash through the building’s side, allowing you the chance to leap on in.
Follow down to a black alley, in which you will find your next Nidhogg Hatchling. Nab this one as well.
Now back on the streets, you should see red streaks on the surface. Continue on and make sure to take a left at the upcoming fork in the road. There will be two demonic gates blocking your path. Use your hatchlings to unlock the gates and then continue onward.
After continuing through the nearby building, make your way to the room on the top floor. Gaze through the nearby opening in one of the walls to see the inscriptions you need to line up in order to make the next glyph. Phew, another one down.
You need to find all of the red orbs in the room to complete this secret mission. Sound easy? It isn’t. You may want to get a hold of V’s sprint skill to make things easier.
DMC Secret Mission #4

The next glyph is tucked away within campaign mission five. Once you have discovered the second leg of the nearby giant demon walking around, a shoddy wall will be visible directly ahead. Summon Nightmare once again so that you can break down the wall, revealing a secret passage.
Another battle is waiting for you nearby, so prepare yourself. After taking out the enemies, bring your attention to the metal staircase at the side of the room. Climb to the top of the staircase and view towards the nearby metal rafter to reveal the next glyph.
This one may take some serious skill. You will have to defeat all of the enemies without getting hit a single time.
DMC Secret Mission #5

For your next glyph, you will have to be in campaign mission eight. Near the end of the level, you will discover your second lava fall. While you will likely want to make your way to its peak, leap to the platform near your right instead.
You will then need to utilize your wire-hook to snag a few grapple points, allowing you to traverse into a nearby hidden area. Once you have entered the area, head to the middle of the room and turn around. The glyph should now be clearly visible.
This secret mission can seem a bit tough. You will have to regularly traverse with your wire-hook through several grapple points. Make sure to keep a steady rhythm so that you don’t overshoot any of the grapple points and you should be fine.
DMC Secret Mission #6

Your next glyph will be waiting for you in campaign mission nine. Just before heading to the catacombs, you should see some tendrils blocking a pathway. Like most of your problems, you can solve this one with Nightmare.
Summon nightmare to destroy the tendrils. Now approach the nearby blue orb fragment. After nabbing the fragment, swivel your view to the entrance of the area to reveal your next glyph.
You will have 20 seconds to kill three enemies for this secret mission, making speed paramount for success. Griffon’s sweeping laser attack will likely be a big help here.
DMC Secret Mission #7

The next glyph is within campaign mission 10. Closer to the end of mission 10, you will find a room featuring two different doors. There will be a posse of enemies to deal with, so make sure to take them out first.
Make your way into the door on the right after the battle, then continue onward up the nearby passage. At the top of the passage will be the next glyph.
You will need to take out a Death Scissor in a single shot to win this secret mission. If you harm the enemy before their weak point is revealed, it’s game over. Parrying the enemy’s attacks is an easy way to open them up for a shot.
DMC Secret Mission #8

The next glyph is within campaign mission 11. Within the mission, you will stumble upon a light-puzzle concerning some tendrils. Dante will then point out a blood sack that you should destroy.
A section of the nearby tower involved in the puzzle will then sink. Backtrack to the opening of the room to reveal the inscriptions you need to line up to form your next glyph.
This secret mission pins you against some seriously tough enemies, including cleaver wielding demons. Make sure to stay on your toes and avoid as much damage as you can, if you want to retain a high ranking.
DMC Secret Mission #9

Campaign mission 12 is home to your next glyph of interest. During the mission, you will eventually be met with a puzzle concerning a large statue. Move the tides of blood to move the statue, revealing a secret entrance down below.
After traversing the series of tunnels, you will eventually come across a large series of steps just before making it to the exit outside. Turn around to reveal a nearby overhang.
Jump onto the nearby overhang and turn your gaze back around to discover your next glyph.
If you take damage during any point of this secret mission, you will fail. On top of that, you will want to come prepared for a heap of aerial combat.
DMC Secret Mission #10

The next glyph is within campaign mission 14. Near the end of this mission — after retaking control of Griffon, Shadow and Nightmare — Dante and Nero will be fighting in the distance.
Smash the blood sac close by to reveal a pathway onward. After traveling down the path for a moment, you will find an opportunity to take a left to another pathway. Destroy the nearby blood sac, revealing another secret area.
Approach the secret area and turn your gaze toward the ceiling to reveal the next glyph.
For this secret mission, you will have to nab the nearby blue orb fragment without ever touching the ground. If you have the Promotion skill, you can just summon Nightmare and ride the golem to your objective.
DMC Secret Mission #11

Campaign mission 15 is next on your list, if you want to find another glyph. This time around, you should reach an upgrade statue shortly after completing the initial portion of the mission. Take a swift right to find a path winding below.
You will then come across a Punch Line devil breaker. At this point, you will need to ride a rocket up the nearby slopes until you reach the end. From there, the next glyph is just a little bit ahead.
You only need to reach the nearby blue orb fragment to finish the mission. However, you will only have 30 seconds. Consequently, Gerbera’s aerial dodge will likely come in handy for this one.
DMC Secret Mission #12

The final secret mission is within campaign mission 16. During the mission, you will eventually observe three large pits that delve into the lower areas of the map. Leap to the second pit, revealing a small alcove nearby. Leap down across the nearby platforms in search of an opening. Once you have entered the opening, enter the area and then turn around. The glyph should now be present. Take note that the relevant ledges during your descent will often be marked with red orbs.
You will need to earn 900 red orbs by defeating nothing more than a single Empusa in order to win the final secret mission. In order to do this, it’s best to utilize Dr. Faust’s firearm.



Comments are closed.