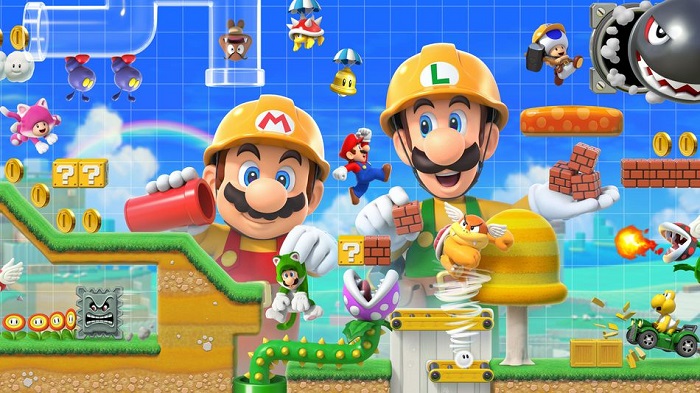
Super Mario Maker 2 is finally here. To the joy of many Mario fans, the game was released on June 28 for the Nintendo Switch. The game features a brand new Super Mario 3D World course maker, as well as a slew of other new additions. If you want to make the most out of this builder masterpiece, then you are going to want to follow these tips.
1. Use Clear Conditions
Clear Conditions is a nifty feature in Super Mario Maker 2 that forces players to have to complete certain tasks if they wish to complete your level. Without a Clear Condition, the player can finish the level by simply making it to the flagpole at the end of the stage.
Setting up a Clear Condition is a great way to funnel the player through all of the incredible parts and pieces of your level. There are few things as frustrating as designing a detailed level and then having your players simply ignore a majority of its features to get to the flag pole as quickly as possible.
2. You Should Be Using Night Mode
Night mode is a new feature in Super Mario Maker 2. However, the feature is not immediately available to players. You are going to have to know how to activate it.
In order to use night mode, you will first have to place an angry sun on your intended level. Then, you can toggle night and day mode for your level. The angry sun will simply be changed into a more pleasant moon for the night mode.
Night mode affects the game differently than day mode. For instance, 1Up Mushrooms will now be Rotten Mushrooms. These items can damage Mario rather than provide a nifty boost. This new feature can be incredibly fun to play around with, so make sure to give it a shot.
3. Don’t Be Afraid to Use the Touch Screen
The original Super Mario Maker was released on Wii U and prominently took advantage of the console’s tablet. Consequently, Super Mario Maker 2’s control scheme is often best utilized from the touch screen with a stylist in hand.
4. Each Theme Functions Differently
Within Super Mario Maker 2, you can change your level’s theme to reflect five different Mario games. The themes range from Super Mario Bros., Super Mario Bros. 3, Super Mario World New Super Mario Bros. to Super Mario 3D World.
While changing the theme can be fun, keep in mind that the rules will change a little for each theme. For instance, the power ups available to you may differ or even the general game mechanics. Learning the differences between the themes will take time and experimentation.
5. Play Story Mode
Okay, most players are going to want to jump right into the level building in Super Mario Maker 2. That being said, you should really play the story mode first.
Mario is tasked with building Peach a new castle, which quickly builds into a fun narrative worth diving into. With that in mind, the story mode is actually a wonderfully designed tutorial that teaches players how to master the game’s many new features.
While you can simply leap into the level builder, you are truly missing out if you do not play the story mode first.
6. Stick to a Theme
The internet is going to be flooded with levels designed as near impossible death gauntlets. If you want your levels to get more traction with the online community, then you are going to have to stick out. Luckily, there are a few ways you can do this.
First, stick to a theme. It will be tempting to want to experiment with every single level design feature at first. But, you should try to keep things relatively simple for your levels. Start with a theme and then expand on that theme as the level progresses.
Next, make sure to identify your level with appropriate tags and a succinct description to attract players. Doing these things will make your level more searchable and will ultimately help you get more players on your levels.
7. You Are Going to Have to Defeat That Level You Just Created
Before you can upload a new level to the world, you will have to first clear it yourself. This was a staple feature of the first Super Mario Maker. That being said, it is still important to keep in mind. Sometimes it can be easy to get carried away with one of your creations, quickly realizing that the hyper-difficult level you just made is near impossible to play.
8. Don’t Forget About Those Alternate Functions
Once you place an object within your level, you can then press and hold the same button used to select the object to reveal the object’s alternate functions. For instance, a Super Mushroom be given wings and made to fly across your level if you wish.
Knowing each and every item’s alternate function will greatly expand your toolset when it comes to level building.
9. Lead the Player Along
Sometimes fan-made Mario levels can feel hectic and directionless. Alleviate this problem by keeping your players on track.
Use coins, arrows and other visual cues to keep your players moving in the right direction. Otherwise, some players may get confused and frustrated.
10. Avoid Leaps of Faith
Many players will not get the hint if you want them to take a leap of faith at any point within your level. While providing visual cues can be helpful, it sometimes requires more.
Make sure your players can always see where they need to land after a jump, not just where they need to leap.


Comments are closed.